Are you tired of constantly wiping your iPhone screen on your shirt or looking for a tissue to clean it? Have you noticed that the dust and grime make it hard to take clear photos or read messages? If so, then an iPhone cleaning kit might just be what you need. In this blog post, we will explore why having a cleaning kit is important, what items should be included in one, and how to use them properly. So grab your phone (after washing your hands) and let’s get started!
What is an iPhone Cleaning Kit?
If you have an iPhone, there’s a good chance at some point it will start to look a little dirty. If you don’t clean it regularly, oils and bacteria will build up on the screen, causing it to become less responsive and eventually even break.
To keep your iPhone working its best, we recommend using an iPhone cleaning kit. There are a variety of kits available online and in stores, so find one that suits your needs. Here are four things to think about when choosing a kit:
1) What type of cleaning do you need? A basic kit will include swabs and cleaners for the screen and body, while more intensive kits may also include wipes and buffers for the camera lens.
2) How often do you plan on cleaning your device? Monthly is ideal, but if you only have time once or twice a year, a weekly kit will work just as well.
3) Are you comfortable doing DIY repairs? A few small tools and supplies are all that’s needed to get started with most homemade kits.
4) Budget is always a factor when shopping for electronics—think about how much money you want to spend vs how often you’ll need to use the kit.
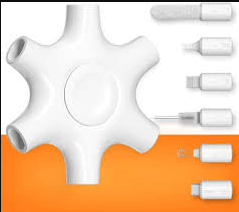
The Different Parts of an iPhone Kit
An iPhone clean kit is a must-have for anyone who owns an iPhone. There are many different parts to an iPhone, and each one can accumulate residue over time. This residue can cause problems with the phone, including decreased battery life, decreased performance, and even crashes.
To ensure your iPhone’s longevity, it’s important to clean each part of it regularly. Here are the different parts of an iPhone kit and how to use them:
The First Step in Cleaning Your iPhone is Unplugging It
Before you do anything else, unplug your phone! This may seem like a common sense step, but often times we unconsciously keep our phones plugged in even when they’re not in use. Keeping your phone plugged in constantly charges it even when it’s not being used, which can wear down the battery over time.
Once your iPhone is unplugged, take it apart by removing the battery and SIM card (if applicable). You’ll also want to remove any covers or stickers that may be protecting the parts inside. Once everything is loose, give all of the parts a good thorough scrubbing with a toothbrush and some soap or waterproof cleaner.
The Second Step in Cleaning YouriPhone Is Wiping Down All Surfaces
After cleaning all of the internal components of your phone, it’s time to wipe down all surfaces that could potentially collect debris. This includes
How to Use an iPhone Cleaning Kit
If your iPhone is looking a little grubby, there are a few things you can do to clean it up.First, use a dry cloth to wipe down the device.
Next, use the included microfiber cloth to clean any fingerprints or smudges on the screen.
Finally, use the included alcohol-based cleaner to clean all of the parts of the phone. Pour some of the cleaner onto a cotton swab and wipe down each part of the phone. Read more…
Conclusion
An iPhone cleaning kit is an essential part of any iPhone owner’s collection. Whether you’ve just had your phone for a few days or it’s been months since you last cleaned it, an iPhone kit will help keep your device running smoothly and looking its best. In this guide, we have outlined the steps to using an iPhone kit and provided some tips on how to select the right one for your needs. So go ahead and get started on keeping your device clean and looking fantastic!